No products in the basket.
Blog
How to Tension Stock Fencing: Everything You Need to Know
Wondering How to Tension Stock Fencing? Read this blog post to find out more.
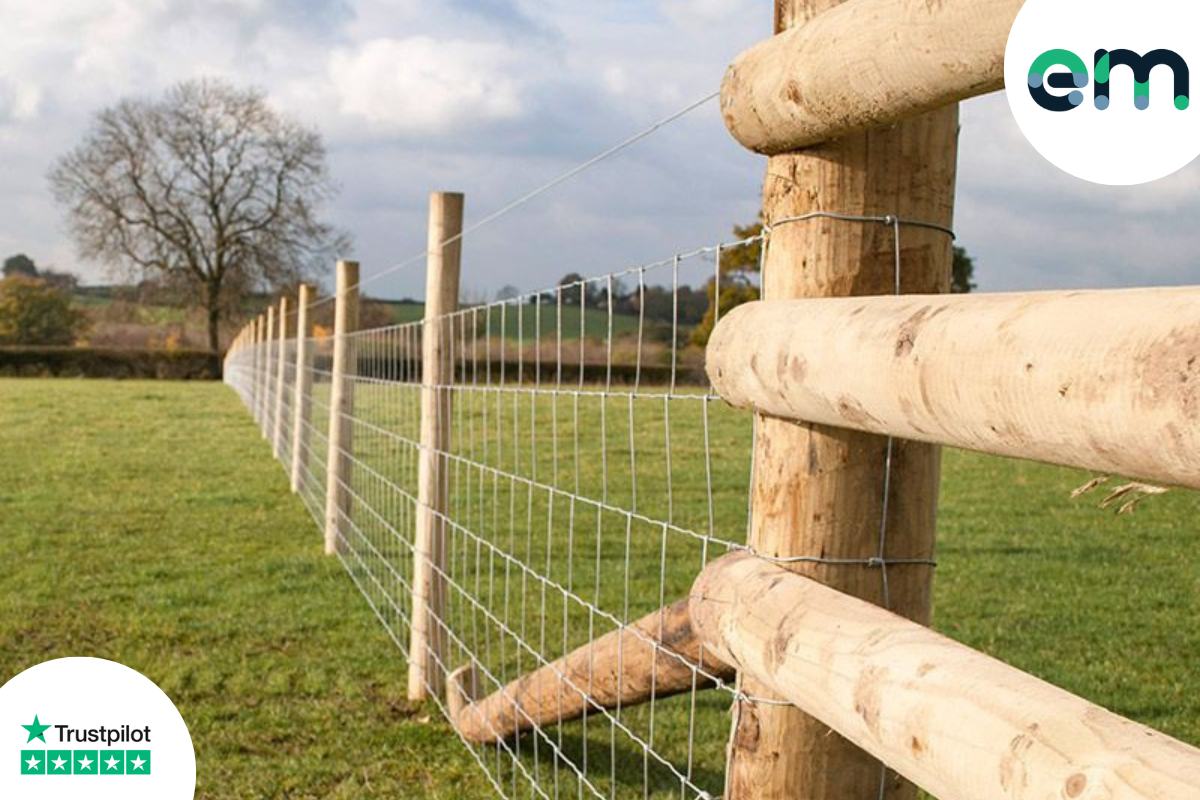
Ensuring that you have robust and resilient fencing is one of the most important things you can do when it comes to effective livestock management and agricultural boundary delineation. Our stock wire fencing is designed to withstand the elements and give you a secure containment solution! We also know that setting up and tensioning your stock fencing can be the make or break to this endeavour so we have put together this helpful guide to alleviate any worries you may have and help you to instil confidence in your border protection.
Let’s talk Stock Fencing Codes!
It can seem quite intimidating when you see the letters and numbers associated with choosing the right stock fencing but it’s pretty simple to understand once it’s been explained, so let’s get you in the know!
- The letter refers to the wire specification: HT = High Tensile, C = Medium and L = Light
- The first number tells you the total number of horizontal wires (please note that spacing of horizontal wires varies and wires are usually closer together towards the bottom).
- The second number gives you the fencing height in cm.
- The third number refers to the spacing between the vertical stay wires in cm. This will affect the overall strength of the fence so the closer together your wires are, the stronger the fence will be.
All of our stock fencing is made from hot dipped, galvanised steel offering which is classed as ‘C’ when it comes to wire specifications. This is the most commonly used grade for livestock (excluding Bulls) and offers both strength, durability and long lasting service.
We have a variety of specifications available to suit most requirements including C8/80/15, C8/80/30, C10/120/15, and C10/120/30.
Which Stock Fence is right for you?
Selecting the correct fencing is crucial to ensure that your livestock stays safe and contained within your field. The configuration you choose should reflect the largest of the animals that you are trying to contain/ keep out. For instance C8/80/15 is perfect for medium sized livestock whereas for larger animals, C10/120/30 is a better choice.
Check out the table below to guide you to the best configuration for your needs.
| Animal | Min Height required | Mild Steel (C Grade) |
| Cattle | 0.9m | ✅ |
| Bull | 1.8m | ❌ |
| Pig | 0.75m | ✅ |
| Sheep | 1m | ✅ |
| Goat | 1.2m | ✅ |
| Llama | 1.2m | ✅ |
| Alpaca | 1.2m | ✅ |
| Horse | 1.4m | ✅ |
| Deer | 1.5m | ✅ |
| Suitable for large animal to lean against | All | ❌ |
| General Field Boundary | All | ✅ |
What will you need for tensioning your stock fence?
Making sure you are sufficiently prepped and tooled before you start will make tensioning your stock fencing much simpler. So, before you head off to the field make sure you have everything you need.
- Fence Posts
- Staple Nails
- Straining Wire Line
- Gloves
- Goggles
All set? Let’s get that stock fence up!
Even if the process of tensioning your stock fencing seems daunting, our simple step by step guide below will help you get it done in no time!
- Site Preparation
- Clear your fence line of any potential obstructions.
- Mark out where your fence posts will go. Properly spaced fence posts will provide you with a strong framework for your fencing.
- Set up Your Posts
- Erect your fence posts ensuring that you are sticking to the correct spacing that is recommended for the stock fencing that you have chosen.
- Ensure that your posts are far enough into the ground to be firm as this will help with tensioning and holding the tension. Typically, digging or driving your fence posts 400mm into the ground is recommended.
- Attach Your Fencing to Your Posts
- Unroll and attach your fencing to the posts as you go.
- Check that your fence is straight and level before attaching to each post to avoid issues as you get further down the line.
- Add Tension
- Using your straining wire, tension your fence. Ensuring that you have proper tension is the key to obtaining a secure and upright fence.
- If you do not have a straining wire you can add tension to your fence by using a pair of pliers.
- Starting with the wires closest to your post, grab the top wire with your pliers halfway between the two vertical link wires.
- Twist the wire 90 degrees back on itself in a “Z” shape.
- Continue the above process from top to bottom on all horizontal wires.
- Repeat the above ii – iv in multiple places along your fencing line until you are happy with the tension.
- Check and Adjust Tension
- Once you have tensioned your fence, check to make sure it is taut and secure.
- Periodically check the tension as over time you may need to adjust the tension to ensure optimal performance.
It is important to remember that seasonal changes can impact the tension of your fence so regular maintenance will be required to make sure that your fence stays in tip top condition and doesn’t let you down.
And there you have it -an effective, secure boundary that, with the proper maintenance, will keep your livestock secure, or intruders out, for years to come!
Always remember, The EasyMerchant Team are here to help you should you need it so if you have any questions, just drop us a line at sales@easymerchant.co.uk or give us a call on 01371 850120 and choose options 1!
Happy Fencing!


“Typically, digging or driving your fence posts 1.2m into the ground is recommended”.
Seriously – 1.2m into the ground?!
Thanks for spotting the typo. We’ll fix this now!